

Im Casco Activ 2 Test schauen wir uns neben der Verarbeitung auch das Gefühl auf dem Kopf, das Gewicht und die Funktionalität an. Hält der Helm was er verspricht?
Inhaltsverzeichnis
Casco Activ 2 – Lieferumfang und Zubehör
Geliefert wurde der Casco Activ 2 in einem Karton. Mit dabei ist eine ausführliche Bedienungsanleitung und einer Austauschkarte für einen Austausch-Service. Mehr dazu später. Mehr lag nicht dabei, lediglich im Inneren des Helms war noch ein Hinweiszettel verklebt, wie der Fahrradhelm korrekt anzulegen ist und für welche Zwecke er genutzt werden darf. Zubehör ist für den Helm optional und nicht im Lieferumfang enthalten.
 zu Amazon, Webseiten, Onlineshops, Händlern oder Hersteller.")
), L (58-62 cm)")
 94,95 €
Casco Activ 2 Fahrradhelm – Haptik und Verarbeitung
Nimmt man den Casco Activ 2 aus dem Karton, macht er auf den ersten Blick einen hochwertigen Eindruck. Schaut man sich die Verarbeitung im Detail an, gibt es kaum etwas zu bemängeln. Die Materialien, Außenschale und Innenschale sind sauber miteinander verbunden. Der Sonnenschirm ist ebenfalls sauber verarbeitet und sitzt exakt am Casco Activ 2. Die Gurte und Riemen sind sehr gut verarbeitet, die Nähte sehen sauber aus und die Verbindung zur Helmschale ist ebenfalls sehr sauber gelöst. Der Verschluss ist das sogenannte CASCO-Loc und funktioniert reibungslos.
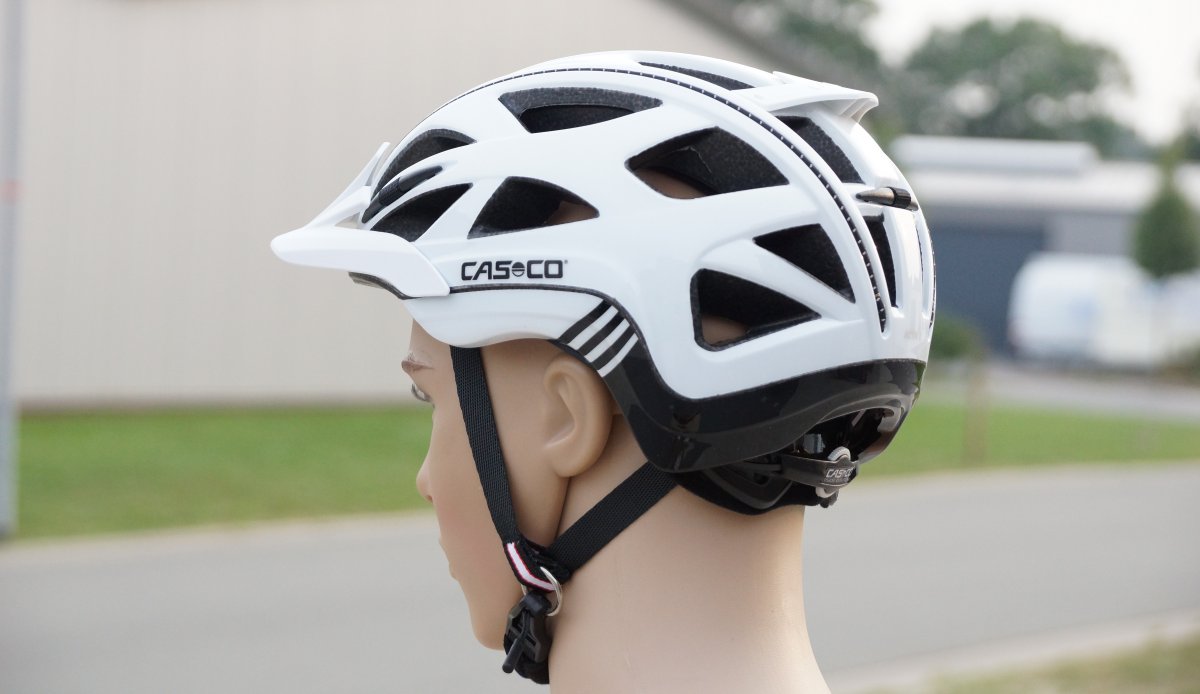
Das Kopfpolster ist mittels Klettverschluss im Helm befestigt und kann zum Reinigen aus dem Helm genommen werden. Das Fliegengitter ist fix und fest im Helm integriert. Bei der Haptik und der Verarbeitung kann der Casco Active 2 Fahrradhelm punkten.
Casco Activ 2 – Technische Daten laut Hersteller
Laut Hersteller Casco hat dieser Sturzhelm folgende technische Daten:
- Größen: 52–56 cm S, 56–58 cm M, 58–62 cm L
- Gewicht 290 g (bei uns mit 288 g gewogen)
- Insektenschutz
- Helmschild
- Disc-fit-Vario
- Reflektoren
Der Helm trägt das CE Zeichen und erfüllt die europäische Norm (EN 1078 A1:2013) für Fahrradhelme, Rollerskates und Skateboards. Die Reflektoren befinden sich als zwei Gummibänder auf dem Helm und ziehen sich von vorne bis nach hinten. Die Gummibänder können bei Casco als „MyStyle“ Option nachgekauft und in verschiedenen Farben ausgesucht werden. Wir haben insgesamt 26 Lüftungslöcher gezählt.
Casco Activ 2 auf dem Kopf
Der Casco Activ 2 sitzt im Test gut auf unserem Kopf. Dies ist immer individuell und subjektiv. Er ist einfach zu fixieren und lässt sich auch einfach wieder abnehmen. Der Verschluss vom Kinngurt ist, einmal verstanden wie er funktioniert, einfach zu bedienen. Wir haben einen Helm in „M“ in der Größe 56 cm bis 58 cm gekauft, haben selbst einen Kopfumfang von 56 cm beim Dummy. Der Helm passt, viel kleiner als 56 cm sollte der Kopfumfang jedoch nicht sein. Die Größenangabe ist recht passend.
Der Helm trägt sich sehr leicht auf dem Kopf und man hat das Gefühl, der Casco Active 2 sitzt sicher und fest. Bei uns hat er an keiner Stelle gedrückt. Dies liegt auch mit daran, dass man den Helm gut auf verschiedene Bedürfnisse einstellen kann. Die Sonnenblende kann bei diesem Helm in zwei Positionen verstellt werden. In der unteren Position mag dies sicher etwas mehr gegen einfallende Sonnenstrahlen helfen.
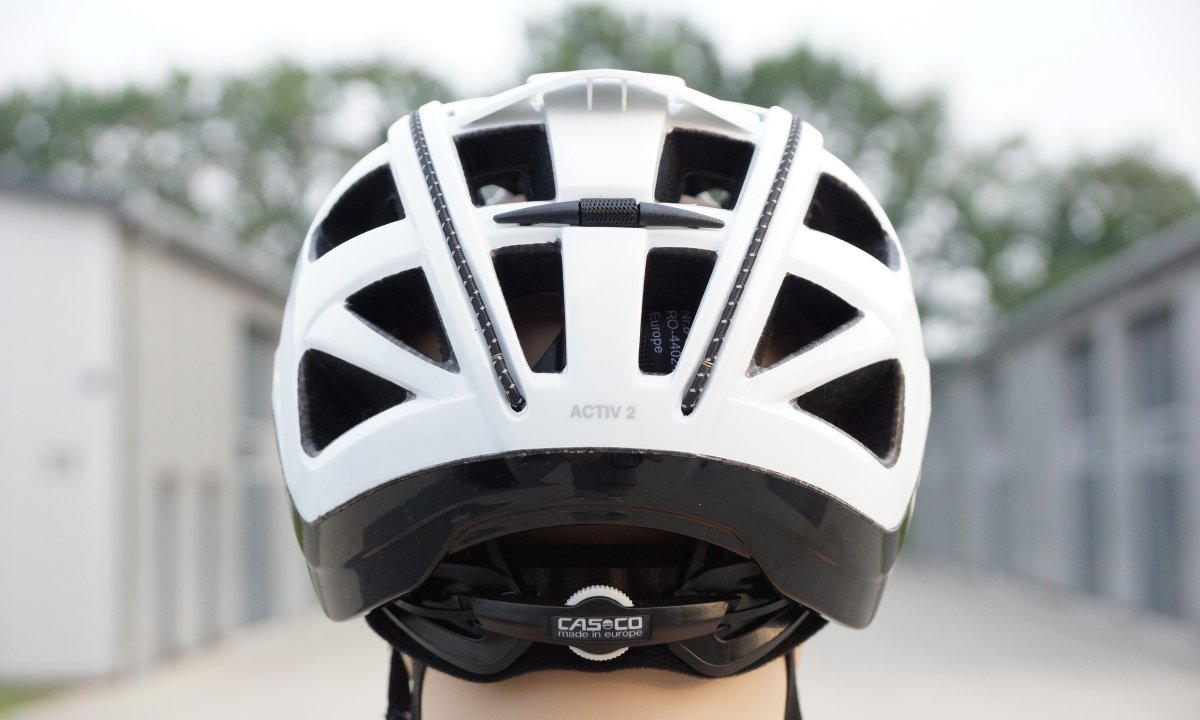
Einstellen der Größe am Hinterkopf
Am Hinterkopf befindet sich ein Drehrad, hiermit wird der Kopfriemen festgezogen und gelöst. Beim Aufsetzen sollte das Rad immer auf ganz aufgestellt sein, der Riemen im Nacken positioniert und jetzt erst zugedreht werden.
- Das Drehrad beim ersten Aufsetzten bitte ganz aufdrehen und den Helm aufsetzten.
- Jetzt den Helm in die richtige Position bringen.
- Mit dem Drehrad im Uhrzeigersinn den Helm enger stellen, bis dieser fest auf dem Kopf sitzt, aber nicht drückt.
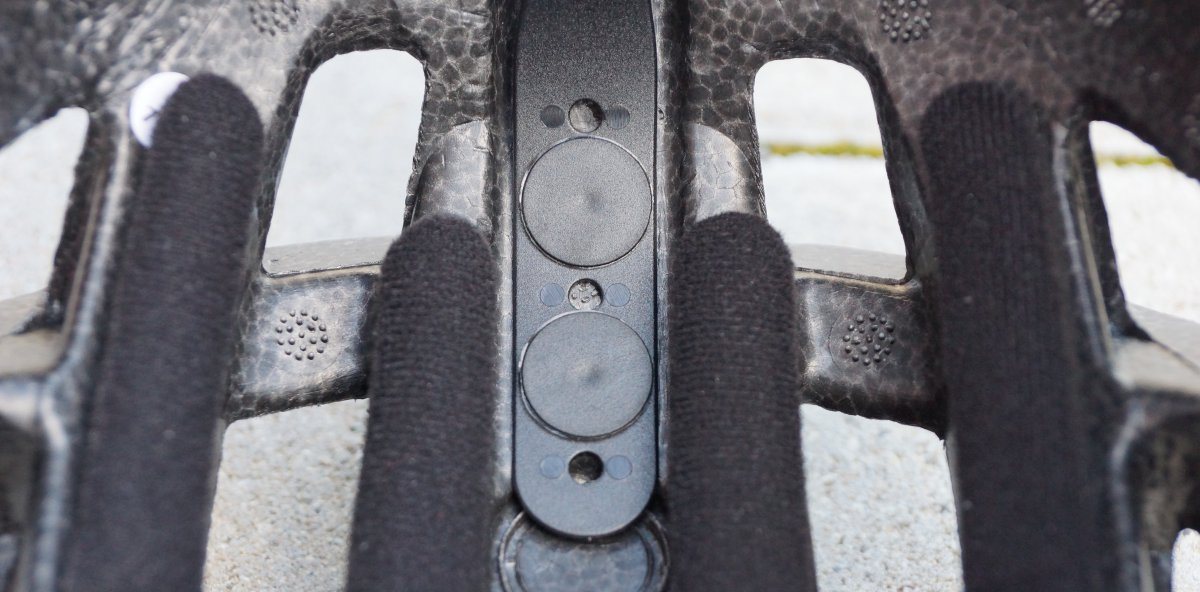
Sollte der Riemen am Hinterkopf drücken, kann man die Höhe einstellen. Dazu gibt es im Inneren des Helmes die Möglichkeit, das Nackengeschirr zu verstellen. Über eine Schiene lässt sich das Nackengeschirr hoch und herunterstellen.
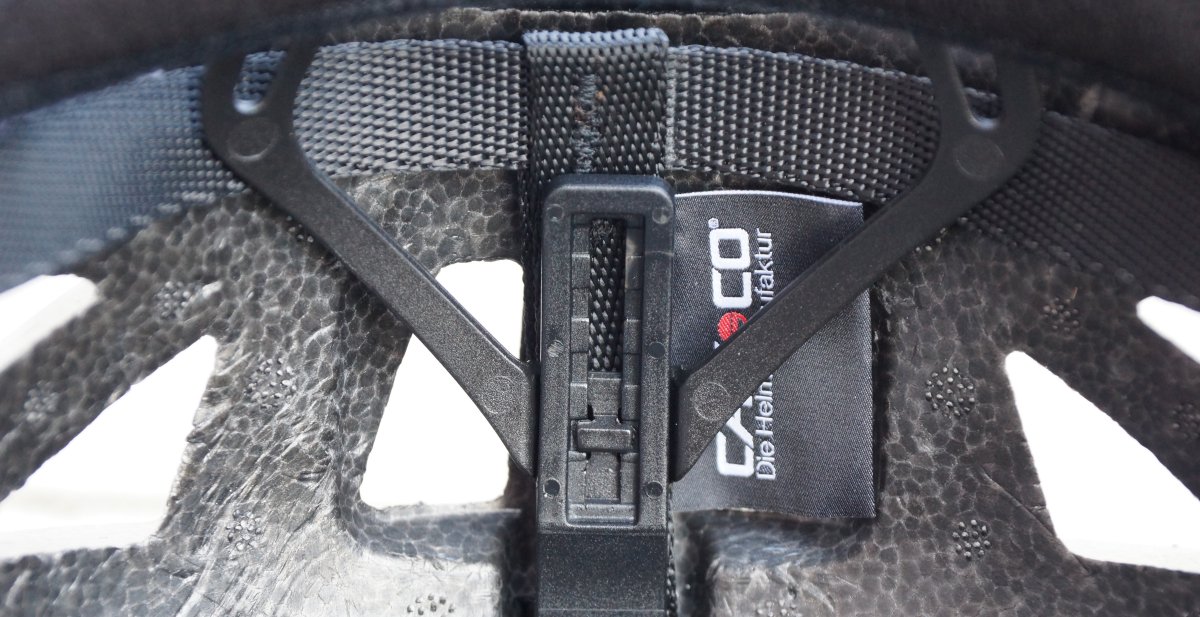
Reicht dies nicht aus, kann im Inneren des Helmes der Kunststoffriemen versetzt werden. Dazu werden zwei platte „Stöpsel“ gelöst, der Riemen über den zwei neuen, gewünschten Löchern gehalten und wieder mit den Stöpseln fixiert.
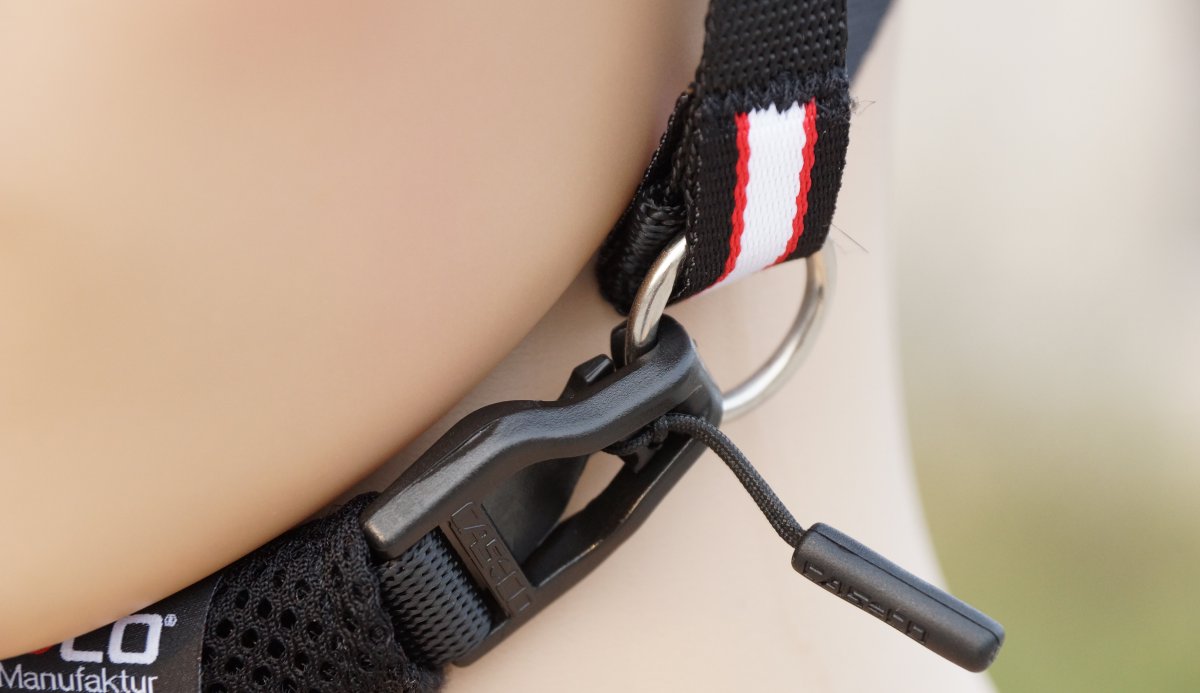
Kinnriemen einstellen
Der Kinnriemen wird über eine normale Riemenverstellung angepasst. Dazu wird das Polster geöffnet (Klettverschluss) und jetzt hat man vollen Zugriff auf den Riemen und kann diesen verstellen. Gesichert wird der Riemen mit einer Öse und einer Art Mini-Karabiner, der in die Öse geklippt wird. Zum Öffnen wird das Bändchen gezogen und der Karabiner öffnet sich wieder. Hat man das Prinzip verstanden, geht dies schnell und ohne hinzusehen von der Hand.
Fazit zum Casco Activ 2 Test
Der Casco Activ 2 hat im Test durchaus überzeugen können. Die umfangreichen Möglichkeiten den Fahrradhelm auf die persönlichen Bedürfnisse einzustellen, lassen ihn punkten. Die gute Verarbeitung und Handhabung sind ebenfalls positiv zu nennen. Der Helm sitzt gut auf dem Kopf, ist mit 288 g (gewogen) nicht zu allzu schwer und bietet ein modernes Design. Der Hersteller bietet diesen Helm in sehr vielen verschiedenen Farbkombinationen an, so ist für jeden Geschmack etwas dabei. Die Reflektorstreifen sorgen für zusätzliche Sichtbarkeit im Dunkeln.
Egal ob auf dem E-Bike oder Trekkingrad, der Fahrradhelm macht im Casco Activ 2 Test eine gute Figur. Mit seinem doch recht hohen Preis muss man sich anfreunden, die weiße Variante von den Bildern hat zum Zeitpunkt unseres Kaufs 90 Euro gekostet. Bei Stiftung Warentest wurde dieser Helm 05/2017 mit „Gut“ bewertet. Wer bereit ist für eine gute Qualität etwas mehr auszugeben, der findet hier einen passenden Fahrradhelm. Wer mehr auf eine geschlossene Bauweise steht, der schaut sich den Nutcase Helm an.